Shop Online. Expert Advice. Personal Service. Speak to a Specialist 087 012 5286
Safely Removing Paint From Wooden Doors: A Step By Step How-To

Image of old paint cracking and peeling off of a wooden surface


Removing paint from wooden doors does not have to be a very difficult task, just follow the steps explained in this blog and you’ll be able to safely remove any paint from your door so that you can reimagine the style you want it to have. We will cover the do’s and don’ts as well as some rookie mistakes that you can avoid, saving yourself some time and effort.


The Setup: Get Your Prepping Done Before You Start


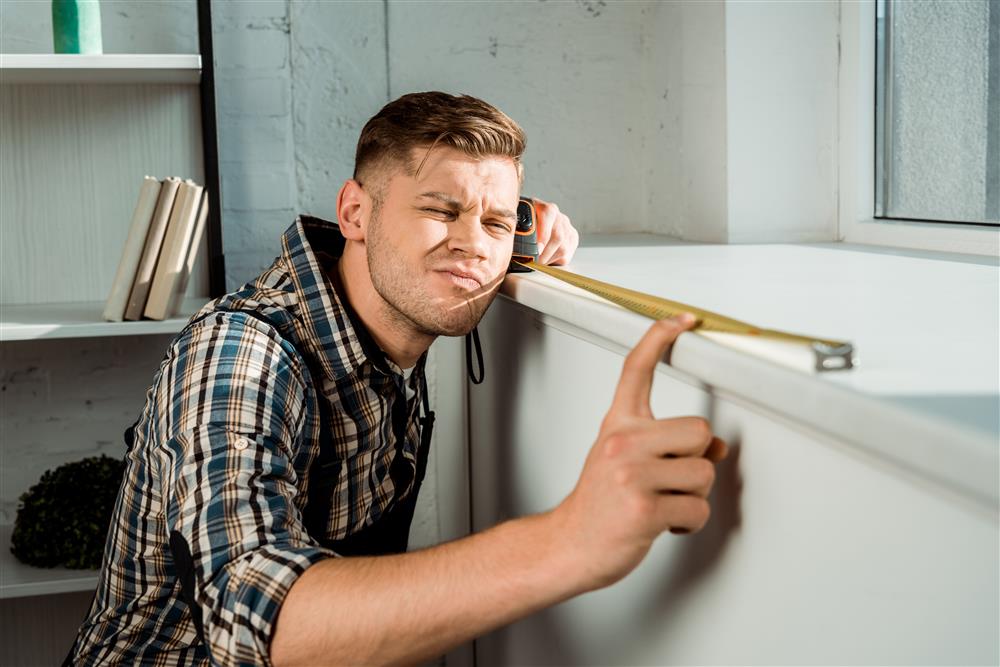
The trick to making this a smooth and straightforward task is getting everything you need ready before you start. A lot of the time we start the process without collecting everything we need, which ultimately results in us frantically running around looking for equipment.


Gear: What Are You Going To Need?


First of all, you will need some safety gear. This includes gloves, safety goggles/glasses, a respirator, and long-sleeve clothing. Most people believe that they don’t need safety gear for numerous DIY projects, but please keep in mind that one minor slip-up could result in injury – not to mention what inhaling certain fumes will do to you.


Prepare The Area: Where Should You Start Your Project


If you don’t want to be cleaning stains, paint chips, and sanding dust for the next few weeks, we recommend covering the floor of your chosen work area with a drop cloth. Ensure that your work area is well-ventilated to reduce the risk of breathing in harmful fumes or dust particles. To increase the ventilation of your workspace you can either work outside, use fans and one or more open windows, or if these are not possible, try to leave the room and take breaks often.


Apply Your Paint Stripper


Before covering your entire door with a paint stripper, apply it to an inconspicuous area so that you can determine how long you need to leave the paint stripper before scraping off the paint. When this is done you can apply it to the rest of the door. Be sure to read the instructions on your paint thinner container and that you apply it in a thick, even coat.

Let your paint thinner sit for the necessary amount of time. This time does vary depending on the thinner, the paint’s type and the thickness of the coat. Follow the instructions on the paint thinner container and be patient as rushing a task like this will only result in more effort on your part.


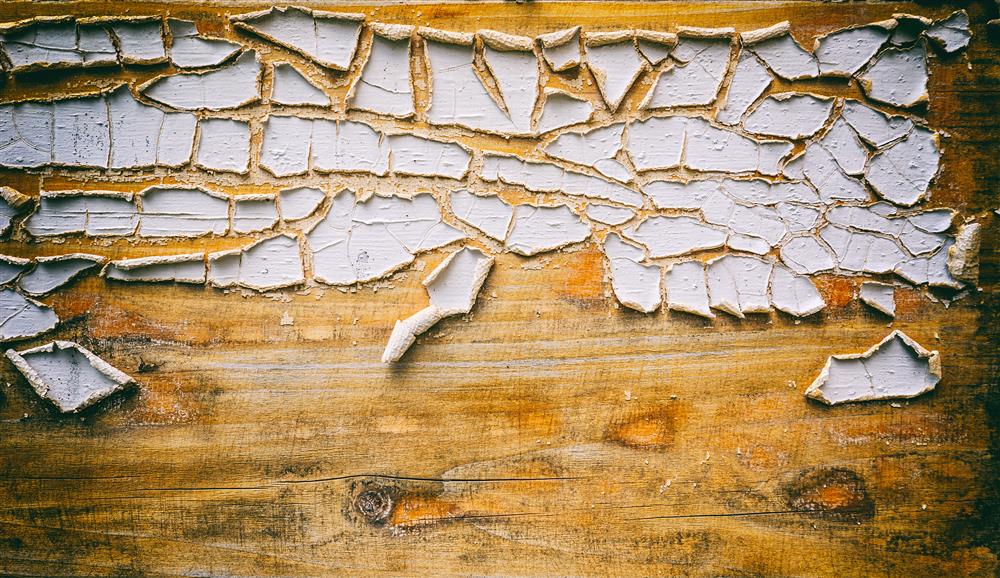
Scrape Off The Paint


Use a plastic scraper and remove as much paint as you can – we use a plastic scraper as they are less likely to damage your door. If there are any stubborn areas where the plastic scraper simply is not cutting it, try using a metal scraper – just be sure to be careful so that you do not damage the wood underneath the paint. If for some reason there are still areas of paint that won’t come off, use a wire brush, but again, be careful not to damage the wood.


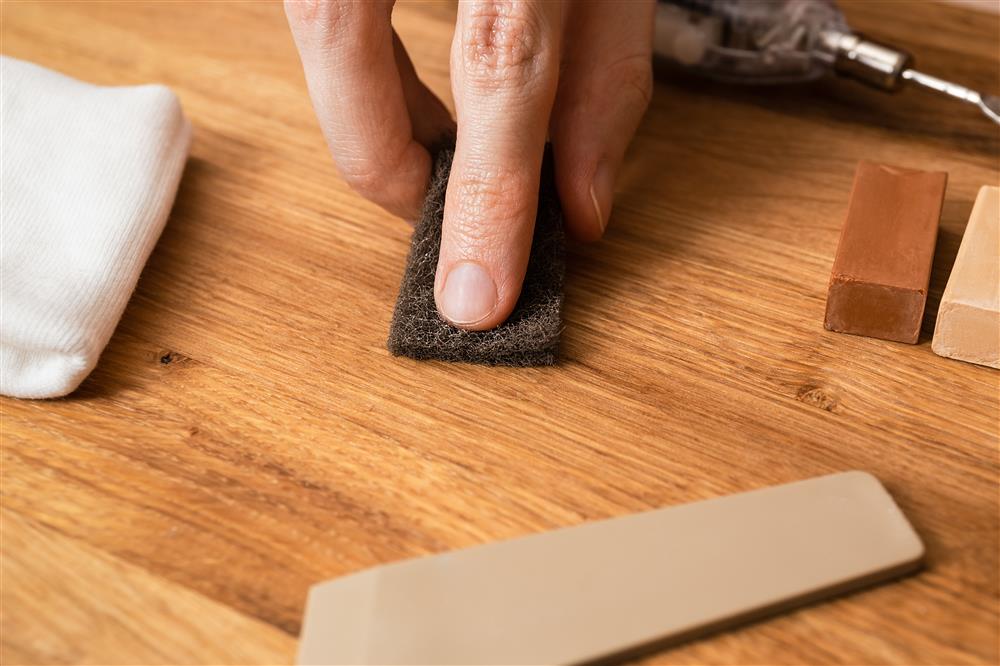
Sand Your Door: Almost Done!


When all of the paint has been removed from your door, sand the door. Start on a coarse grit and move your way up to a smooth grit. This will help remove any imperfections from the surface of the door and will leave you with a perfectly smooth surface. Patience really counts in this step of the project, if we rush sanding, we will be left with an uneven surface texture. Take your time and enjoy the process!


Dispose Of Your Paint Stripper: The Last Step


It is important to dispose of your paint stripper properly, your paint stripper container should have instructions on how to safely dispose of your paint stripper. We want to ensure that we get rid of our paint stripper safely and properly as it can cause harm to people and the environment.


What Are The 5 Don’ts Regarding This Type Of Project?


  1. Do not work in an enclosed space. The fumes from paint thinner can very quickly build to the point where a face mask will not keep you from becoming dizzy – or even falling unconscious! Don’t make this rookie mistake and work in a well-ventilated area (and remember your respirator).
  2. Do not become aggressive or impatient when sanding the door. We understand that sanding a door down can be tedious, tiring, and time-consuming – especially if you don’t have a belt sander. That being said, don’t make the rookie mistake of rushing the job or sanding too aggressively, as this will only result in damaged wood and a visually unappealing finish or texture on your door.
  3. Do not use a paint stripper on lead paint. As we know, lead paint is highly toxic and can cause some serious health problems. The rookie mistake here would be assuming that we can use a paint stripper to deal with lead paint at home without facing health repercussions. Please get the lead paint removed by a professional.
  4. Never eat or drink while you are working with a paint stripper or while you are sanding your door. This rookie mistake is the best way to ensure you ingest harmful substances. When you want to eat or drink, please ensure you leave your working area and eat or drink after cleaning your hands thoroughly and removing any contaminated gear.
  5. Do not dispose of your paint stripper or your sanding dust down the drain, or in your trashcan. These substances are classified as hazardous waste and should be treated as such. Avoid the rookie mistake of not following proper protocol when disposing of these substances.


Seeking Professional Advice


Do not hesitate to get in touch with the Doors Direct team if you have any questions or concerns, we would be more than happy to guide you through whatever you need. Remember that with a little preparation and a little bit of love and care, you can transform your home into something beautiful. If you want your doors and other wooden installations to last, all you need is to follow the appropriate protocol and give them some TLC. Feel free to check out our other blogs if you want more information and tips to assist in future projects, and to keep you safe.

Choosing Between Internal Sliding Barn Doors and Internal Bifold Doors: The Perfect Fit for Your Space

Image of a wooden sliding door inside a home


When it comes to interior design, doors play a significant role in defining the overall aesthetics and functionality of a space. Both internal sliding barn doors and internal bifold doors have gained immense popularity due to their unique characteristics and space-saving features. As a homeowner or interior designer, making the right choice between these two stylish options can be a challenging task. In this blog, we will explore the key differences between internal sliding barn doors and internal bifold doors, helping you make an informed decision that suits your home's needs and style.


Which Is Best For You?


Internal Sliding Barn Doors


  1. Aesthetic Appeal: Sliding barn doors offer a rustic and charming appeal, adding character and warmth to any space. They are often made from wood or metal, boasting a vintage and traditional feel. These doors are particularly popular in farmhouse-style or industrial-themed interiors.
  2. Space-Saving Elegance: One of the primary advantages of sliding barn doors is their space-saving design. Since they slide along a track mounted above the door frame, they don't require any floor space to swing open or closed. This makes them a fantastic choice for rooms with limited space or where conventional doors might obstruct furniture placement.
  3. Versatility: Internal sliding barn doors can be used in various settings, such as bedroom entryways, closets, pantries, or even as room dividers. Their versatility allows them to adapt to different interior designs and room layouts.
  4. Privacy and Sound Control: While sliding barn doors can offer privacy, they may not provide a perfect sound barrier due to their slight gaps around the edges. If sound isolation is a significant concern, you might need to consider additional measures like weatherstripping or choosing a solid-core door.


Internal Bifold Doors


  1. Contemporary Elegance: Bifold doors offer a sleek and modern look, making them a popular choice for contemporary and minimalist interiors. They are available in various materials like wood, glass, and composite, allowing you to choose the perfect match for your decor.
  2. Space-Saving Efficiency: Similar to sliding barn doors, bifold doors are excellent space-savers. They fold inwards and stack against one side of the door frame, maximizing the usable floor area. This feature is especially valuable for small rooms or areas where space optimization is essential.
  3. Wide Openings: Bifold doors are ideal for larger openings, such as closets, laundry rooms, or entertainment spaces. When fully opened, they create a seamless transition between rooms, making them perfect for hosting gatherings or events.
  4. Enhanced Sound Control: Unlike sliding barn doors, bifold doors offer better sound insulation due to their solid construction when closed. This can be advantageous if you need to create private spaces or minimize noise transfer between rooms.


Choosing the Perfect Fit


To make the right decision between internal sliding barn doors and internal bifold doors, consider the following factors:

  1. Available Space: Assess the space where the door will be installed and determine which option will best utilize the area without hindering furniture placement or movement.
  2. Aesthetics and Interior Design: Choose the door style that complements your home's interior design and reflects your personal taste.
  3. Functionality and Purpose: Consider the primary purpose of the door. Is it primarily for aesthetics, privacy, or sound control? Choose accordingly.
  4. Materials and Durability: Select high-quality materials that offer durability and longevity, ensuring your chosen door will withstand daily use.
  5. Installation and Maintenance: Evaluate the installation process and maintenance requirements for each door type, and choose the one that aligns with your preferences and capabilities.


Conclusion


Both internal sliding barn doors and internal bifold doors offer unique advantages, making them excellent choices for different spaces and design preferences. We hope this guide has helped you understand the key differences between the two options, allowing you to make an informed decision that best suits your home's needs and style. Whether you prefer the rustic charm of sliding barn doors or the modern elegance of bifold doors, DoorsDirect has a wide selection of premium-quality doors to transform your space. Happy door shopping!


What Are the Standard Aluminium Window Sizes in Your Country?


Aluminum windows have become increasingly popular in modern architecture due to their durability, sleek appearance, and energy-efficient properties. They are widely used in residential and commercial buildings, offering various benefits to homeowners and businesses alike. However, before purchasing aluminum windows, it's essential to know the standard sizes available in your country. In this blog post, we will explore the common standard aluminum window sizes in different regions, using metric dimensions.


Different Aluminium Windows & Their Sizes


  1. Understanding Standard Window Sizing: Standard aluminum window sizes are designed to fit typical window openings without the need for custom manufacturing. These sizes are based on commonly used dimensions in construction and are readily available from various manufacturers and suppliers. Standardization helps streamline the production process and makes it easier for builders and homeowners to find suitable windows for their needs.
  2. Common Aluminum Window Sizes: While window sizes can vary based on design preferences and building codes, here are some standard aluminum window sizes commonly found in many countries, presented in metric measurements:


  1. Single Hung Windows:
    • Width: 60 cm to 120 cm
    • Height: 90 cm to 180 cm
  2. Double Hung Windows:
    • Width: 60 cm to 120 cm
    • Height: 90 cm to 180 cm
  3. Sliding Windows:
    • Width: 90 cm to 210 cm
    • Height: 60 cm to 150 cm
  4. Casement Windows:
    • Width: 50 cm to 100 cm
    • Height: 60 cm to 180 cm
  5. Awning Windows:
    • Width: 60 cm to 120 cm
    • Height: 60 cm to 90 cm


Note: These are general ranges, and specific sizes may vary between manufacturers.

  1. Custom Window Sizes: While standard sizes are widely available, some buildings might require custom-sized aluminum windows. Non-standard window dimensions may be necessary to fit unique architectural designs or to replace windows in older buildings with non-standard openings. Custom windows can be manufactured by specialized companies, ensuring a perfect fit for any window opening.
  2. Considerations When Choosing Window Sizes: Before finalizing the window sizes for your project, consider the following factors:
  • Building codes and regulations in your region.
  • Energy efficiency and insulation requirements.
  • Design preferences and aesthetics of the building.
  • Practicality and ease of maintenance.


Conclusion


Choosing the right aluminum window size is essential for both functionality and aesthetics. Standard sizes provide a cost-effective and readily available option for most projects, while custom sizes cater to unique architectural needs. By understanding the standard aluminum window sizes in your country and considering specific requirements, you can make an informed decision and enhance the overall appeal and functionality of your building.

Remember, it's always best to consult with window professionals or suppliers who can guide you in selecting the perfect aluminum windows for your specific needs. Whether you're constructing a new building or renovating an existing one, investing in high-quality aluminum windows can significantly improve your space's comfort, energy efficiency, and overall value.


1. Standard Aluminum Window Sizes in South Africa (Metric Dimensions):


Window Type

Width Range (cm)

Height Range (cm)

Single Hung

60 - 120

90 - 180

Double Hung

60 - 120

90 - 180

Sliding

90 - 210

60 - 150

Casement

50 - 100

60 - 180

Awning

60 - 120

60 - 90


2. Standard Aluminium Window Sizes in the UK (Metric Dimensions):


Window Type

Width Range (cm)

Height Range (cm)

Single Hung

60 - 120

90 - 180

Double Hung

60 - 120

90 - 180

Sliding

90 - 210

60 - 150

Casement

50 - 100

60 - 180

Awning

60 - 120

60 - 90


3. Standard Aluminum Window Sizes in the USA (Imperial Dimensions):


Window Type

Width Range (inches)

Height Range (inches)

Single Hung

24 - 48

36 - 72

Double Hung

24 - 48

36 - 72

Sliding

36 - 84

24 - 60

Casement

20 - 40

24 - 72

Awning

24 - 48

24 - 36


4. Standard Aluminium Window Sizes in India (Metric Dimensions):


Window Type

Width Range (cm)

Height Range (cm)

Single Hung

60 - 120

90 - 180

Double Hung

60 - 120

90 - 180

Sliding

90 - 210

60 - 150

Casement

50 - 100

60 - 180

Awning

60 - 120

60 - 90


5. Standard Aluminum Window Sizes in Australia (Metric Dimensions):


Window Type

Width Range (cm)

Height Range (cm)

Single Hung

60 - 120

90 - 180

Double Hung

60 - 120

90 - 180

Sliding

90 - 210

60 - 150

Casement

50 - 100

60 - 180

Awning

60 - 120

60 - 90


Please note that the ranges mentioned in the tables are approximate and may vary slightly between different manufacturers and suppliers. Always check with local window suppliers for the most accurate and up-to-date information.


Cracking the Code: Why Wooden Doors Crack and How to Prevent It

Image of a man filling in cracks on a wooden surface with wax.


Nothing quite compares to a beautiful solid wooden door, but much like your pet fern that needs some TLC to thrive, your amazing wooden door needs a little lovin' too!

In this blog, we’ll be looking at why wooden doors crack, what role humidity plays in the whole process, installation techniques that may prevent cracking, some maintenance tips as well as a step-by-step guide to repairing cracks when they do occur.


The Culprit Unveiled: Understanding the Causes of Wooden Door Cracks


Amidst the charm of wooden doors lies an inconspicuous culprit – moisture. Humidity, the unseen saboteur, can quietly wreak havoc on our beloved doors. Wood undergoes a delicate dance of expansion and contraction with changing seasons, making it susceptible to cracks.


During humid months, wood swells as it absorbs moisture from the air, while dry conditions cause shrinkage and stress on the door's structure. This repetitive cycle takes a toll, resulting in unsightly cracks.


Understanding humidity's influence is key to preventing these cracks. By controlling indoor moisture and ensuring proper ventilation, we shield our wooden doors from harm, preserving their allure for generations to come.


Moisture Matters: How Humidity Affects Wooden Doors


Humidity, an unpredictable foe, silently assaults your wooden doors, threatening their integrity. As moisture levels fluctuate, the wood expands and contracts, potentially leading to cracks and warping.


In hot, humid weather, doors may swell, sticking or rubbing against frames. Conversely, in dry conditions, contraction causes unsightly gaps affecting aesthetics and insulation.


Fear not! Armed with knowledge and strategies, shield your doors from humidity's mischief. We'll explore effective measures, from sealants to dehumidifiers, maintaining an ideal moisture balance. Master this battle, and your wooden doors will endure, remaining strong and beautiful for years to come.


Nailing Down the Issue: Proper Installation Techniques


When it comes to the longevity and stability of your wooden doors, proper installation lays the foundation for a crack-free future. This section delves into the essential aspects of installing wooden doors with precision and finesse.


  • The Art of Alignment: Achieve a flawless fit by ensuring the door and frame are perfectly level and plumb, reducing the risk of cracks over time.


  • Say No to Over-tightening: Avoid over-tightening screws and hinges to prevent structural imbalances, which can lead to warping and cracking.


  • Mind the Gaps: Properly seal gaps between the door and frame with weatherstripping or insulation to enhance energy efficiency and minimize moisture entry, a common cause of wooden door cracks.


  • All About Expansion Gaps: Incorporate appropriate expansion gaps during installation to allow the door to breathe and adapt naturally to changes in humidity and temperature, avoiding stress-induced cracks.


Master these installation techniques to ensure your wooden doors stand strong and steadfast against the test of time.


Crack Prevention 101: Proactive Measures for Happy Wooden Doors


  • Embrace Regular Cleaning: Dust and wipe your wooden doors regularly with a soft, damp cloth, avoiding harsh chemical cleaners that can damage the wood's surface.


  • Seal the Deal with Varnish or Paint: Apply protective varnish or paint to shield your doors from moisture and temperature changes, reducing the risk of cracks.


  • Weather Stripping for the Win: Install weather stripping around the edges to create an extra barrier against the elements, minimizing the likelihood of cracks.


  • Mind the Humidity: Use a dehumidifier in humid environments and a humidifier in dry climates to regulate moisture levels, preventing excessive wood expansion and contraction.


  • Routine Inspections: Regularly check for damage or wear, addressing issues like loose hinges or small cracks promptly to prevent worsening.


  • Gentle Handling: Treat your wooden doors with care, avoiding slamming or hanging heavy objects to prevent unnecessary stress that could lead to cracks.


Follow these tips to give your wooden doors the tender loving care they deserve, ensuring they stay strong, beautiful, and crack-free for years to come.


Sealing the Cracks: A Step-by-Step Guide to Fixing Door Cracks


  • Assess the Damage: Examine the cracks on your door to determine the extent of the problem.


  • Gather Your Tools: Get all the necessary tools, including wood filler, putty knife, sandpaper, and paint.


  • Clean and Prep: Clean the cracks and surrounding area, ensuring it's free from dust and debris.


  • Apply Wood Filler: Fill the cracks with wood filler, using a putty knife to spread it evenly.


  • Sand it Smooth: Once the filler dries, sand the repaired area until it's smooth and level with the door surface.


  • Paint or Varnish: Match the door's finish with paint or varnish to seamlessly blend the repaired section.


Voila! Your door is now crack-free and looking fabulous once again. Enjoy the satisfaction of a job well done! 


Conclusion


In conclusion, by understanding the role of humidity and embracing the right prevention techniques, you can protect your wooden doors from the dreaded cracks. Proper installation, routine inspections, and gentle handling go a long way in preserving their beauty and longevity. And should cracks occur, fear not! Our step-by-step guide will equip you to fix them like a pro. So, go ahead and give your wooden doors the TLC they deserve, and they'll reward you with timeless charm and a crack-free future.


Doors too far gone or just time for a change, visit us to view our full range of doors.