Shop Online. Expert Advice. Personal Service. Speak to a Specialist 087 012 5286
Learn How To Incorporate Sliding Wooden Doors In Your Home

how to incorporate wooden sliding doors in your home


The Art Of Integrating Sliding Wooden Doors In Contemporary Interior Design


Discover the Versatility of Sliding Wooden Doors in Modern Homes & Create Your Dream Interior!


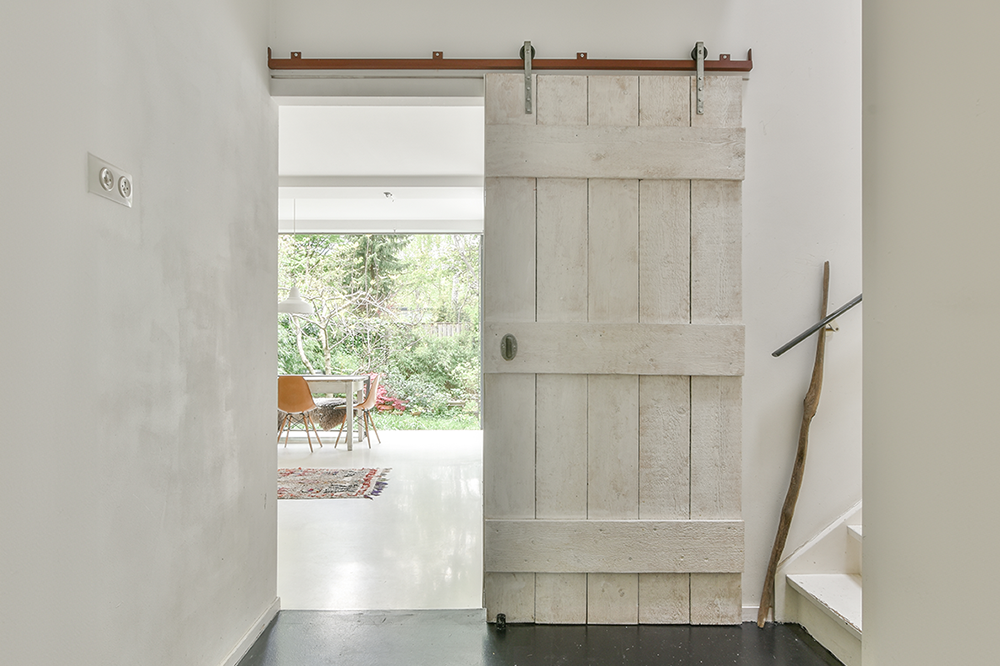
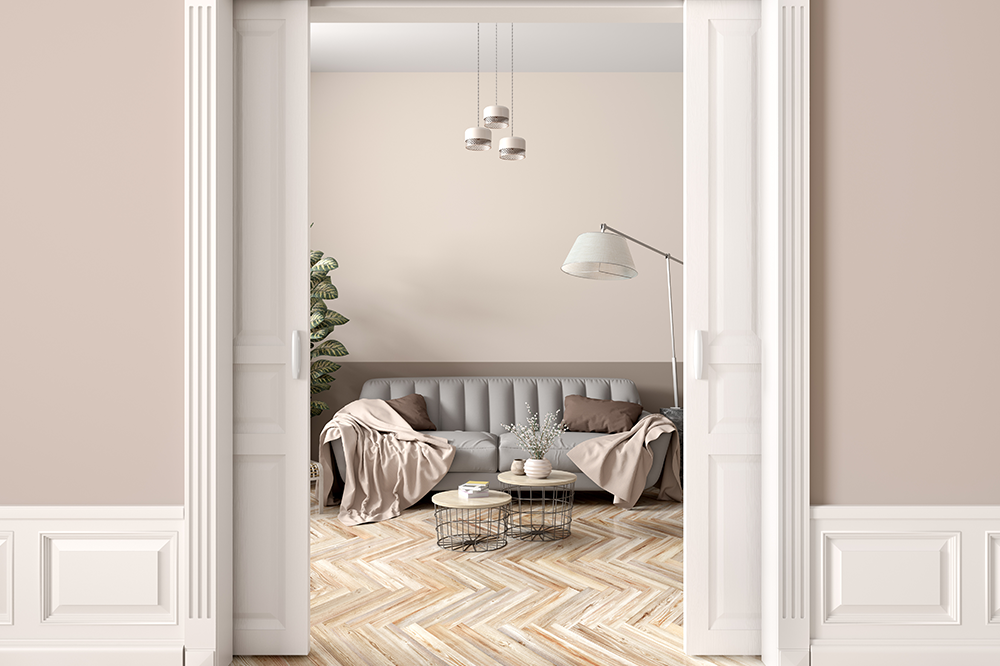
Sliding wooden doors are an ideal addition to modern minimalist design. Seamlessly dividing spaces without occupying floor area, they can either blend subtly into the room or stand out as bold design features and can be customised to align with both functional needs and architectural aesthetics.


For homeowners looking to optimise their space and elevate their interior design, sliding wooden doors offer a sleek, contemporary solution. Their versatility suits various spaces, from living rooms and bedrooms to cupboards.


In this guide, we share innovative sliding door design ideas to transform your space, enhance functionality, and showcase your unique style.


Sliding Doors Inside The Wall


A wall-mounted sliding wooden door is an excellent choice for a contrasting look or when there isn’t space for the door leaf within the wall. Depending on its design, the door leaf can serve as a striking feature with a unique wood species or other textured surfaces. Alternatively, for a more subtle effect, you might select a finish that blends with the wall or includes glass panels.


Sliding Wooden Doors Become Part Of The Interior


In contemporary design, wood has become a key element, adding warmth and natural beauty to interiors while perfectly aligning with today’s leading trends.


More than just a building material, wood now represents sustainability, aesthetics, and a connection to nature. As a result, it’s increasingly used as a foundational component of interior architecture, with doors seamlessly integrating into the overall design.


Decorate With Sliding Doors


A sliding door is a versatile feature in interior design, allowing for a wide range of stylistic expressions. A painted sliding door that matches the wall colour can create a seamless, unified look, while a door in natural wood materials can introduce a warm, contrasting element to the room.


Benefits of sliding wooden doors

  • Space-Saving - A sliding door conserves floor space since it doesn’t need to swing open into the room.
  • Seamless Transition - A sliding door allows for an easy, seamless flow between rooms.
  • Ideal for Small Spaces - A sliding door maximises floor space in compact rooms and narrow hallways.
  • Soft-Close Feature - An option when fitted allows you to enjoy the familiar gentle close found in high-quality kitchen drawers.


Sliding Wooden Doors Adapted To The Room


Customising a sliding door to fit the exact dimensions of your space can help maximise small rooms and hallways that might otherwise be challenging to utilise.


In compact rooms, where space is limited, sliding wooden doors are an ideal solution if wall space is available, as they don’t require floor clearance for opening.


In areas with narrow or angled door frames, a sliding door can enhance visual appeal by creating the impression of a larger entryway than the actual opening.


Made-to-measure Sliding Wooden Doors


When choosing a new wooden sliding door, it’s helpful to explore the available options. For a floor-to-ceiling design that either conceals open shelving and wardrobes or provides a space-saving doorway, there are custom-made, modern sliding wooden doors tailored to complement your interior design.


Sliding Wooden Doors With Many Finish Options


When selecting the design for your new sliding door, consider whether you'd like it to blend seamlessly with the wall and room or stand out as a distinct interior feature. Regardless of your choice, there are numerous surface options to either accentuate or downplay the door.


Popular and classic finishes include solid wood, painted wood, glass, or veneered wood.


Large Sliding Wooden Doors


Large sliding wooden doors are ideal for modern architecture with high ceilings, where floor-to-ceiling doors can serve as movable walls. This design choice adds visual continuity, creating a sleek, unbroken line within the architectural space.


Indoor Sliding Wooden Doors Rooted In A Well-functioning Danish Design


This sliding door embodies Danish architectural heritage, showcasing an ideal balance between form and function. When not in use, it remains unobtrusive, while always providing convenience and comfort when you need to separate a room.


At Doors Direct, we celebrate exceptional design by using high-quality, natural materials that add value to the door with an understated elegance. Its simplicity allows it to complement any home, as technical details are either concealed or designed discreetly in the case of surface-mounted sliding doors.


Integrating sliding wooden doors into your home design not only maximises space but also introduces a stylish element to your interiors. With a wide range of options available from Doors Direct, you can find a wooden sliding door that meets both functional requirements and aesthetic tastes.


Selecting the right design can facilitate a smooth transition between rooms, enhance natural light, or provide a striking visual accent to your home. Whether you're renovating an existing space or designing a new one, consider these sliding door ideas to bring both beauty and practicality to your living area.

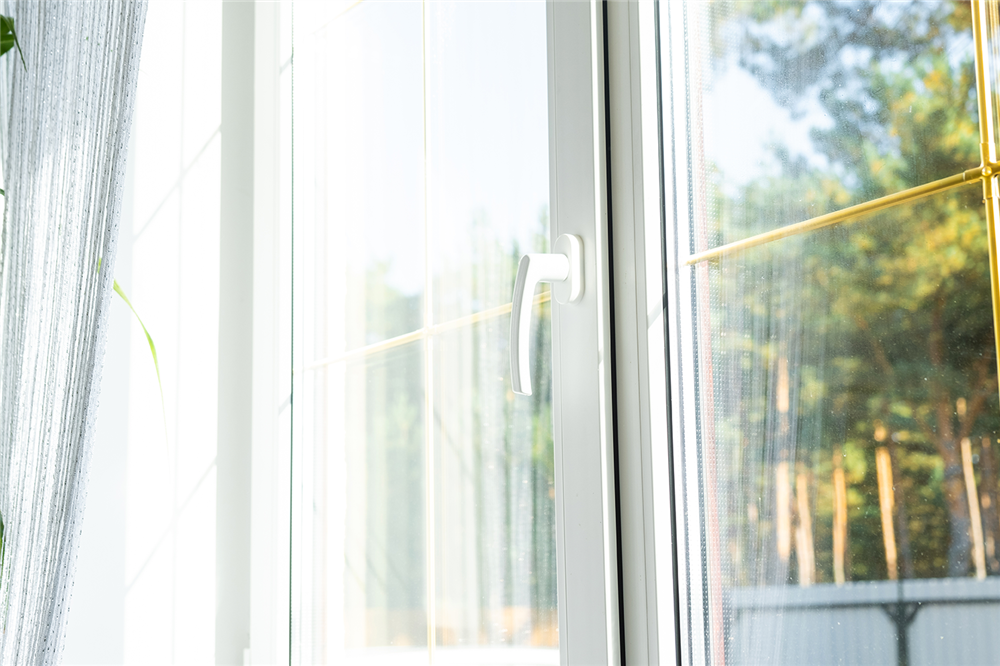
Discover Expert Tips On Installing Your Own Window Frames


How You Can Install Your Own Window Frames: A Step-By-Step Guide


Key Considerations Before Starting Your DIY Window Frame Installation


It’s out with the old and in with the new! Whether you're replacing your window frames because they are old, deteriorating, or in desperate need of an update, we’re here to help.


In this article, you’ll learn how to install wooden or aluminium window frames, and the importance of proper installation. Ensuring your frames fit correctly and securely, are weather-tight, and function properly.


Installing Your Window Frames


Installing window frames is a relatively easy task, provided you are removing the existing window frames and replacing them with the exact same size.


Before you begin, you need to know the frame size needed. To do this, carefully measure the existing brickwork opening (hole in the wall) from the outside. Make sure not to measure the existing window frame as it will be smaller than the brick opening.


If the bricks housing the window are plastered over the frame, chip away some of the plaster to expose the bricks to measure accurately. Then, accurately measure the height and width in at least three places and use the shortest measurements.


Tools Needed


Once you’ve accurately measured the brickwork opening, it’s time to start the installation process. This will involve gathering all the necessary tools and materials to get the job done.


1. Safety gear (including gloves, safety glasses and hearing protection).

2. Spirit level to ensure that the window frame is installed straight and that it is level with the wall.

3. Drill and drill bits to drill holes for screws, anchors, or fasteners.

4. Screws, anchors, or fasteners.

5. Screwdriver set (including a Starpoint (Philips), Flathead and different-sized screwdrivers).

6. Hammer to tap shims and adjust during installation.

7. Shims to ensure that the window frames are level.

8. Saw to cut along the window (you can use a milling machine or a reciprocating saw for this).

9. Crowbar to wedge the old window out of the opening.

10. Tape measure to accurately measure the window opening and the frame.

11. Caulking gun to apply sealant or caulk around the window frames for weatherproofing.


Removing The Old Window Frames


For safety and security reasons, ensure that you purchase the new window frames beforehand and check the size before removing the existing frames.


To remove the old window frame, start by putting on your safety gear and enlist the help of someone if the window frame is heavy.


Next, remove any locks, handles, and hinges by unscrewing and completely detaching the opening sashes at the hinges, if applicable.


Scrape out the old putty that holds the glass and remove the small metal glazing nails. Use a chisel or similar tool to chop out the hard putty taking care not to break the glass.


Remove the glass from the frame and put it aside. With the glass and opening sashes removed, carefully remove the old window frame from the brickwork opening. If nails are securing it in place, remove the frame by cutting it out of position. Cut through the transoms and mullions and remove them completely. Then cut through the side jambs at an angle, about one-third of the way up from the window sill, taking care not to damage the internal plaster.


Next, insert a crowbar behind the cut jambs and lever the window frame away from the wall. To reduce damage, place a piece of flat wood between the plaster/brick and the crowbar. This will help to protect the wall surface when pressure is applied.


If your window frames are wooden, get a sufficient grip on the jambs and use your hands to completely pull out the old wooden frame. Remove the head and the window sill in a similar manner, i.e. cutting through and levering away. There may still be horns in the bricks on each side of the opening, just pull them out (they should pull out easily). The resulting holes will need to be filled with mortar mix and cannot be used again.


Finally, check the opening for any remaining nails and traces of old mortar and remove this to leave a clean, clear opening.


Installing Aluminium Window Frames


Start by accurately measuring the window opening and ensuring that it is square and level. Next, clean the opening, making sure to remove dirt, debris and old sealant. Wait for it to dry and make sure the surface is smooth before applying a layer of sealant or caulk to the inside edges of the window opening. Then carefully position the aluminium window into the opening, ensuring that it is level and square. Finally, secure the window in place using screws, anchors or relevant fasteners.


Installing Wooden Window Frames


With the opening prepared, lift the window frame into position from the outside. Leave a gap of about 3mm, top to bottom and side to side between the brick opening and the frame. These gaps are crucial as they allow the frame to be aligned correctly and set squarely.


When setting the window frame into the opening, make sure that the drip groove on the underside of the window sill is clear of the outside wall. Then use wedges to push the frame up against the lintel</a. above. Check that it is level using your spirit level and adjust the wedges if necessary.


The next step is to align the jambs. They need to be perfectly vertical, so use the spirit level on both the outside and inside faces of the window to check if they are vertical. Use wedges to hold the frame in place. Then check that you’ve positioned the window frame correctly by measuring the frame diagonals, keeping in mind that the measurements need to be exactly the same.


Adjust the thickness of the wedges as required to ensure accurate square positioning. Finally, unlatch the opening sashes to make sure that they open easily and secure the frame to the brick using frame fixers, taking care not to distort the frame. Once the frame is securely fitted, use silicone to waterproof it and treat it with a sealer to ensure that no warping occurs.


Browse our other blogs for more useful tips and tricks on doors, windows, and general home improvement and as always, we recommend you speak to a professional if you’re unsure about anything regarding your project.

How To Install Your Own Stylish Barn Door: Beginner’s DIY Guide


Barn Doors For Beginners: Our Simple Planning & Installation Guide


Installing a barn door is a fantastic way to upgrade your home’s interior aesthetic appeal and its space-saving functionality - all while adding a touch of charm to your home. This guide will briefly walk you through planning, selecting the right materials and assembling/installing your barn door.


Planning Your Barn Door Installation


Choosing the Right Location:


When picking the best location for your new barn door there are a few things to consider in order to reach the perfect balance between aesthetic appeal and functionality. Barn doors are popular for bedrooms, spare rooms, laundry rooms, dressers and storage spaces due to the fact that these doors are wonderful at saving space. Considering that barn doors slide on a rail instead of opening in an arched swing, they are ideal for areas that would become cramped with a wide, swinging door.


Barn doors are a fantastic option for those who want to create seamless transitions between rooms or those who need to conserve space, such as people in urban homes with a compact design or storage/utility spaces. Barn doors add a touch of rustic charm to your space while keeping your space open and neat. The absolute most important thing to consider above all else is whether you have the wall space for a barn door to slide open completely.


Do you Have The Wall Space For A Barn Door?


Before you jump into picking out your door and installing it, let’s make sure that you have the sufficient wall space for a barn door with the following 4 simple steps:

  1. Measure the Opening - start by measuring the width of your door opening (the opening that your barn door will be covering). Traditionally, your barn door will have to be at least 50mm wider than your opening on both sides (this is about 2 inches on each side). This is to ensure full coverage of the opening while resulting in visual balance and a more aesthetically pleasing end result.

  2. Calculate the Wall Space You Need - It is crucial to have enough space on your rail for the full width of your door plus any and all hardware (bumpers, anti jump discs etc.). This additional hardware can take up between 50mm and 100mm and sometimes more in some cases. To calculate the wall space required we thus need enough space for the entire door (opening width + 100mm or more if you need a larger door) and any additional hardware you may need or want (at least 50mm to 100mm). We highly recommend you speak to a professional to figure out what hardware you will need and the width of said hardware.

  3. Double Check for Obstacles - Ensure that there are no light fixtures, switches or outlets along the wall where your door will be opening. It’s important that the rail is mounted on a flat surface with no interruption. It is possible to mount your barn door in such a way that it moves over certain types of light switches and outlets, however this can very easily result in an unintended or undesired finished look as barn doors are traditionally no more than 10mm to 15mm from the wall.

  4. Ceiling Height and Header Installation - The final step is to ensure that your ceiling height allows for enough space to install your barn door rail. Generally you would need around 150mm to 200mm above your door opening to account for your railing and hardware, however, the exact space needed in your specific circumstance varies based on the door you want and any additional hardware that you may need. Most homes will accommodate the height needed for barn doors, but we suggest you consult with a professional to be sure. If your wall studs do not align with track placement, you are going to need to install a barn door header board.

Selecting the Door Style and Material:

Selecting the right barn door is quite straightforward, especially since these are commonly interior doors. This means that you rarely need to worry about durability and resistance against the elements, unless the inside of your home is extremely humid or has extreme temperature fluctuations. That being said, we always recommend opting for something high quality, with good durability and resistance. This will ensure that your internal doors remain pristine and last much longer. Popular wood options in South Africa include Pine, Meranti and Saligna. Which one is best for you mostly depends on your personal style preferences and your budget - just remember to ensure that you select the right size for your opening. We recommend you consult with a professional so that they can help you pick the best style and the best price for your project.

Preparation & installation

What You Will Need to Install Your Barn Door

Tools:

  • Tape Measure
  • Level
  • Stud Finder (if applicable)
  • Drill & Drill Bits
  • Pencil
  • Wrench Set


Material:

  • Barn Door Kit (Door, Track, Rollers, Mounting Hardware and Floor Guide)
  • Screws (ensure screws are correct for your wall’s material) and Wall Anchors
  • Mounting Board (if necessary)

Assembling the Door:

Assembling your barn door should be a simple and straightforward process, seeing that with high-quality kits you get all the hardware you need, including tracks, rollers, and mounting components. If you’re interested in quality barn door kits, please check out our range of gorgeous wooden barn doors today. Your kit should come with detailed instructions, but here’s a brief overview of what to expect:

  1. Prepare Your Space & Unpack Your Kit: You will need to clear a large flat area to lay out all components, tools and materials that you’ll need during the assembly. After this you can unpack your barn door kit to ensure you have everything you need.

  2. Install the Rollers: Install your rollers on the top of your door. Ensure these are attached properly as they will have to carry the full weight of your barn door.

  3. Install Your Header Board (If Necessary): If you have drywall or some other type of wall that won’t be able to support a barn door and your wall studs don’t line up with where you need to install your track hardware you will need to install a header board. You can then install your track to the board just installed.

  4. Mount the Track: Measure and mark the placement of your track above the door opening. Remember to use your level to ensure that track is straight before drilling your holes. Drill your holes and install your track and wall anchors.

  5. Hang Your Barn Door: Lift your door and hook the rollers on the track you just installed. This step may require you to get assistance. Once the door is hooked securely, slide it up and down the track slowly to ensure that it opens and closes smoothly.

  6. Install the Floor Guide & Final Tests: Install your floor guide on the floor to ensure the door can’t swing out and that it slides smoothly. Ensure that the floor guide aligns properly with the track for optimal functionality and that it looks good. Again, after this is done, slide the door up and down the track slowly to ensure smooth operation. Tighten any loose screws and ensure all components are secured properly.

Again, your door should come with detailed steps, but if they don’t and you feel you need more assistance or information than we’ve provided above, please don’t hesitate to contact us for some expert advice or professional help. Maintenance and long term care for interior barn doors are simple and straightforward as they can be taken care of like any other wooden door. Just keep them dry, clean and reapply your chosen finish as needed, the only difference with barn doors is that you need to clean the track and other additional hardware every now and then so that it continues to function smoothly.

In sum, installing a barn door is a great way to improve your home’s interior in terms of style, space and functionality. With the right planning and the right door you will transform your home into a space filled with charm and character. Remember to measure accurately and don’t hesitate to ask for professional help if you’re unsure. Feel free to browse our range of stunning barn doors. Alternatively, if you want more blog about maintenance, home improvement, doors or windows, please have a look at our other expert blogs and guides.

Aluminium Window Frames VS uPVC Windows


Integrating Aluminium or uPVC Windows into Your Home Design: Which is For You?


Choosing the right material for your window frames may seem daunting at first, especially when considering two popular non-wooden materials that are quite different from each other. In this blog, we break down the pros and cons of aluminium and unplasticised polyvinyl chloride (uPVC) window frames. Continue reading to discover the essential characteristics, advantages, and disadvantages of these materials, and make an informed decision for your home.


Overview of Aluminium Window Frames


Aluminium windows have been around since the mid-1900s and have been an insanely popular choice for contemporary architecture on account of their sleek, modern appearance and their notably durable construction. Aluminium window frames’ inherent robustness and stability make them especially suited for large, transparent window installations. Aluminium’s high strength-to-weight ratio makes minimalistic frames with larger glass areas possible, maximising natural light and outside views.


Aluminium windows are naturally resistant to corrosion, rot and water damage, making them increasingly popular in areas with harsh weather conditions, including coastal areas, where the salt spray and high humidity deteriorates lesser materials. Those looking for a low maintenance, modern and stylish window solution for their homes can safely invest in aluminium windows.


Pros & Cons of Aluminium Windows


Advantages of Aluminium Window Frames


Durability & Lifespan - Aluminium windows are renowned for their robust nature, which is the main contributor to their 40 to 50 year lifespan (if maintained properly). This longevity makes aluminium window frames a desirable choice for many homeowners.


Visual Aesthetics - With their sleek frames and wide range of colours to choose from, Aluminium windows are built for modern architecture. They allow for flexible design and architectural choices that incorporate large panel windows that flood your building with natural light and blend the lines between inside and outside.


Eco-Friendly Design - Aluminium is nearly 100% recyclable, giving the material a very low environmental impact across its lifecycle compared to other materials. Aluminium windows are thus very well aligned with sustainable building practices.


Low-maintenance - Window frames constructed with aluminium require very little maintenance while continuing to offer fantastic resistance and durability. The most you’re required to do in many cases is to properly clean your aluminium window frames every 3 to 4 months (every month in coastal regions) in order to maintain their appearance.


Disadvantages of Aluminium Window Frames


Low Thermal Efficiency - Windows made with aluminium frames require modern thermal breaks or special construction to be thermally insulating. Without these, aluminium windows are less energy efficient than some other materials, which can lead to higher energy cost, especially in regions that experience extreme cold. Opting to either get thermal breaks or specially constructed windows can increase the already higher upfront cost of insulation.


Overview of uPVC Window Frames


uPVC windows are renowned for their high insulating and budget-friendly nature. These windows started to become popular in the 1980s and they gained traction due to them solving the problem of aluminium framed windows that would form condensation and become very cold, especially during winters. uPVC is a type of hard plastic, which is very durable and resistant to rot, water, corrosion and environmental wear/tear. This allows uPVC window frames to sport a long lifespan with minimal maintenance. These windows come in a variety of colours and finishes, although a smaller variety than aluminium windows, making them an attractive option for buildings of many architectural styles.


Pros & Cons of uPVC Window Frames


Advantages of uPVC Windows


Energy Efficiency - uPVC windows have good thermal insulation, which helps reduce energy costs by maintaining the internal temperature of your home.


Low Maintenance - uPVC windows, much like aluminium windows, require very little maintenance. They require only regular, simple cleaning to keep the window frames looking new. Their resistance to fading and various forms of damage contributes to these windows’ long lasting, low maintenance durability.


Disadvantages of uPVC Windows


Aesthetic Drawbacks - uPVC windows tend to have a bulkier, less modern look compared to the sleek design of aluminium window frames. This does result in them not working completely in buildings of a more contemporary architectural style.


Durability Limitations - Although uPVC windows are inherently durable and resistant to a range of damages, they do have a much shorter lifespan than aluminium windows, generally lasting around 20 years (up to 30 with professional, regular maintenance).


Customisation Limitations - As mentioned earlier, uPVC windows do have a range of colours and finishes. These are, however, much more limited than what is available for aluminium windows. uPVC windows can also not be painted over without special types of paint.


Environmental Impact - uPVC windows are less environmentally friendly than aluminium windows. Since uPVC is a durable plastic, it is not easily recyclable and releases toxic chemicals when burnt. The production of uPVC also requires an energy-heavy process that releases toxins, thus uPVC is the less sustainable choice. 


In sum, when making the choice between aluminium and uPVC for your windows, we suggest you consider your budget, desired aesthetics, environmental concerns, maintenance requirements and the desired longevity of your windows. Aluminium windows are the perfect choice for those looking for durability, modern/sleek design and eco-friendly options. uPVC windows, on the other hand, are great for those in the market for a thermal insulating, low maintenance option.


Both options offer their own unique pros and cons that need to be considered. We highly recommend consulting with a professional before making any final decisions, as they can help you strike the right balance between style, functionality and any other factors in order to assist you in finding your perfect option.


Please feel free to take a look at our other blogs if you want more information, tips and guides on topics relating to doors, windows and home improvement.


Interior Doors Reimagined - The Comprehensive Guide to Restoration and Repurposing

Open The Door To Sustainable Style By Upcycling Your Wooden Interior Doors

Interior doors have always been more important than most realise, especially with regard to visual aesthetics. They definitely play a huge role in the functionality that your home’s rooms have, but they also offer the opportunity to inject personality, style and your own vision into your home’s interior. With the increased interest in sustainability and DIY projects, there has been a growing trend of homeowners restoring and repurposing their old interior doors. This offers not only a creative outlet, but also gives people the opportunity to be a part of the sustainability movement while giving their home’s interior a fun, personal touch. This blog will ultimately talk about different tips and ideas for reviving old interior doors, providing you actionable inspiration and advice. From door restoration to creative ways to repurpose old doors. Whether you’re a home improvement pro or brand new to the world of DIY, the possibilities are endless.


The Beauty of Restoration


Understanding the Value of Old Interior Doors


The beauty of restoration when it comes to old interior doors lies in their craftsmanship as well as the materials used in their construction, as both of these aspects often surpass what is available today. Historically, these doors were made using solid wood and traditional joinery techniques, which naturally resulted in doors with greater durability and strength compared to the more mass-produced modern doors that are commonplace today and often rely on composite materials and other cost-saving manufacturing strategies. Restoring old interior doors rather than replacing them is much better for the environment. These restorations reduce the demand for new materials, thus reducing the environmental impact that is associated with the production, installation and ultimate replacement of most modern interior doors. Needless to say, restoring doors preserves a piece of history. Deciding on restoration over replacement, especially in historic, traditionally built homes, can preserve the home's architectural integrity and the home's character for future generations. Ultimately, the restoration of old interior doors not only honours the craftsmanship or the artistry of the past, but it also allows one to actively participate in today’s eco-friendly movement. Restoration rather than reconstruction also allows homeowners to preserve the unique features of their homes, while reducing the carbon payback period of said homes.


Assessing Your Door's Potential for Restoration


Assessing whether your old interior door offers any potential for restoration includes a few checks. You will have to assess the door’s material (is it solid wood etc?) and its structure. Check for clear indicators of damage like large cracks, rot or any other signs of damage that might have compromised the integrity of your door. If your door has some light surface damage or imperfections, then restoring it while preserving the door’s original character should not be too difficult. If, however, you discover heavy damage or significant rot that may have compromised the overall structure of your door, then restoration may not be the way to go. If you're new to the world of DIY or wood in general, we highly suggest speaking with a professional so that they can help you figure out how much damage is too much.


Restoration Basics


You will need sandpaper, scrapers, a vacuum, paint brushes and the finish you would like to use. The basics of door restoration involve removing the door hardware, sanding it to remove the old finish, scraping the mouldings and in corners where your sander can’t go (be careful and patient so that you don’t accidentally gouge or chip the wood), hand sand the door’s profiles and then remove the dust before applying multiple coats of new finish and letting the door dry. Please consult a professional before undergoing this task if you are unfamiliar with it. Have a look at our blogs for more comprehensive guides on removing paint from doors, and other maintenance tips and tricks.


Creative Repurposing Ideas


Transforming Doors into Decor


Don’t throw out your old doors if the restoration route doesn’t work out. Creating decor out of old interior doors is a great way of repurposing them and adding a unique, personal touch to our home’s interior aesthetic. You can take old bi-fold doors and use them to create a corner shelving unit. If you have a bigger interior door to work with, you can turn it into a rustic bench seat. Doors with arches make great wall decorations and larger doors can even be fashioned into stylish headboards. The possibilities are endless and there is a vast array of inspirations out there. Consulting a door, woodworking or interior design specialist would be recommended for those who are unsure where to start when it comes to a project like this.


Painting and Accessorising Your Repurposed Door


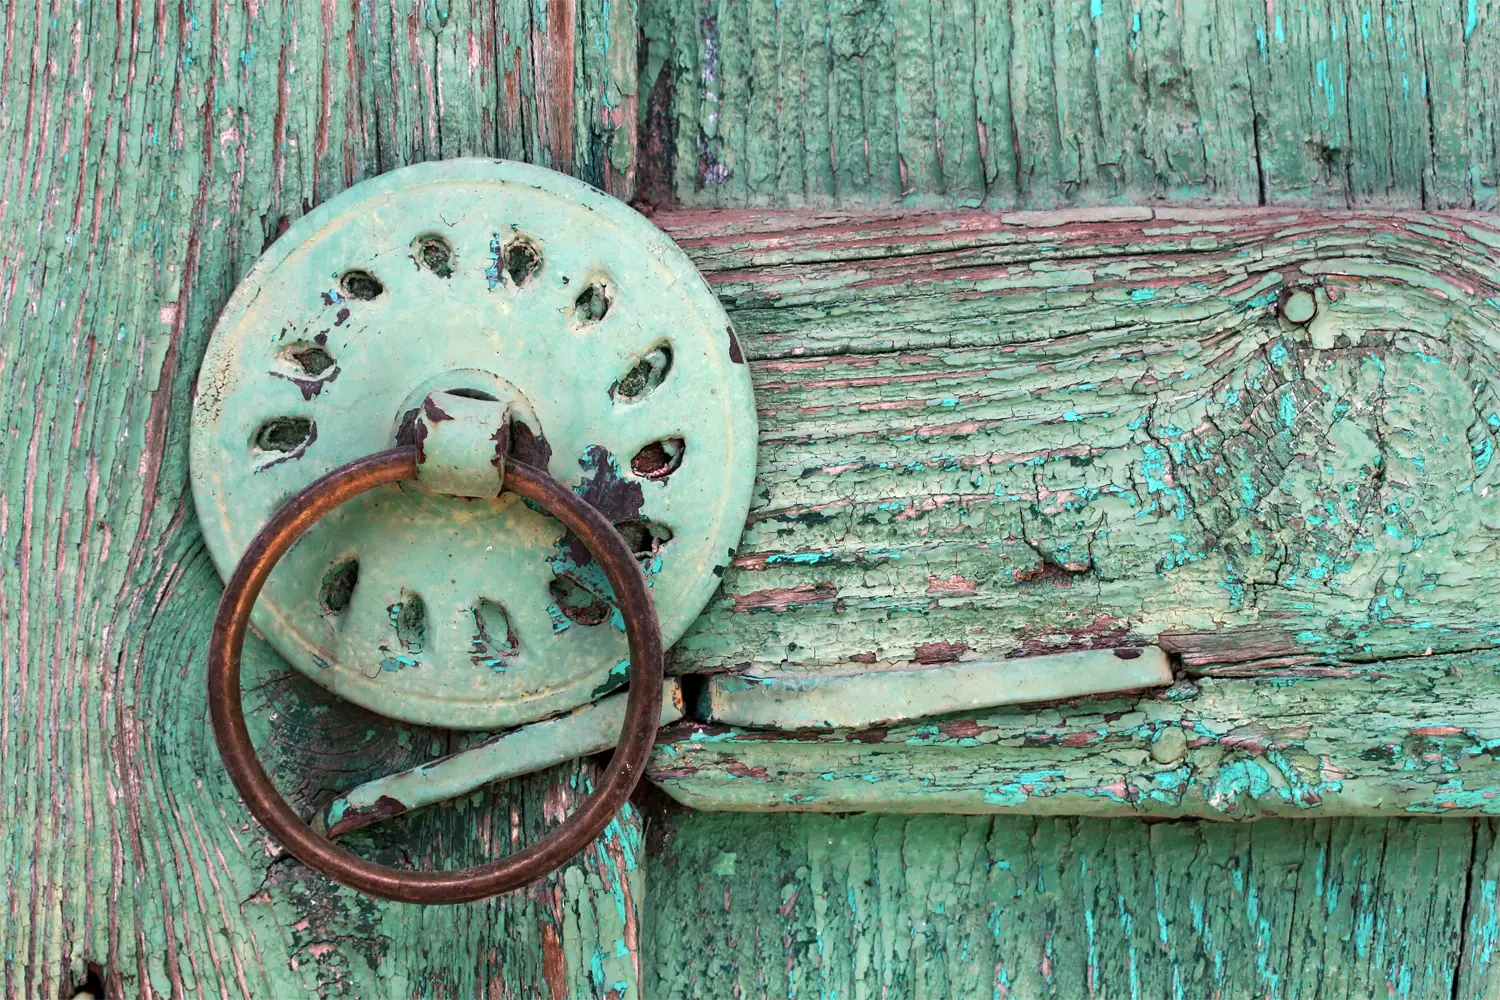
Personalising your repurposed doors is a great way to add creativity and new functionality to the doors, resulting in unique decor pieces that complement or even enhance your home’s aesthetic. Using these old interior doors as canvases allows you to express your individual style and vision in such a way that it matches your home’s existing decor. Incorporating your existing door hardware allows for interesting elements to your new decor piece. Whether you’re going to paint your project for a modern distressed look or use stencils for a patterned style, the possibilities are virtually endless. Selecting the appropriate finish for your new decor is just as important as ensuring it matches the style you’ve envisioned. Whether it's a varnish to protect the wood in outdoor spaces or a special paint that can withstand high humidity in bathrooms, selecting the right finish can help ensure that your repurposed interior door withstands the test of time and regular use. Adding door hardware to your repurposed wooden interior door has mainly aesthetic benefits. It can add a touch of authenticity to the new piece of furniture/decor which can act as a focal point that injects the piece with character and history. In some cases door hardware can be functional as well - wall mounted decor with door knobs can act as coat hangers for example. The only limit for your new decor/furniture piece is your imagination. In sum, giving old interior doors a new lease on life through either restoration or repurposing is a rewarding endeavour that blends history with personal creativity in an eco-friendly sustainable way. This guide has highlighted a few ways you can gauge the restoration potential of old doors, briefly discussed the restoration process on old doors and displayed the endless possibilities for repurposing doors by turning them into unique, stylish decor/furniture pieces for your home. Taking on a project like restoring or repurposing isn’t just about DIY home improvement; it is about sustainability, creativity and self-expression. Feel free to read any of our other blogs for more information, pro tips and guides relating to doors and windows. And for the final time, please consult with a professional before making any decision or taking any action to ensure the best possible outcome.

Different Types of Wooden Doors & Which is for You

Choose the Perfect Door to Match Your Home and Your Vision


Choosing the right door for your building is more important than most people realise: Different types of doors can have massive differences in terms of your space’s aesthetic, functionality and security. Doors can differ on a variety of aspects such as construction material (durability & maintenance requirements), design, insulation properties (and similar features), how they align with the architectural and overall style of your specific building or home, and so much more. In this blog we will discuss different types of wooden doors (with a focus on design) and how you can go about choosing the perfect one for you.

Understanding the Basics of Wooden Doors

Hardwood Doors vs. Softwood Doors

Hardwoods, such as oak or mahogany, are famous for their inherent density and durability, which make them a popular choice for furniture, flooring and general construction across the planet. Hardwood’s rich patterns and inherent weight make it a very aesthetic wood to have incorporated throughout your home, but it is quite difficult to work with because of its hardness. Softwoods on the other hand, like pine or cedar, come from trees that grow a lot faster and are more abundant than hardwood trees. This material is less expensive and is easier to work with than hardwoods. Softwood offers simple grain patterns and are often used in construction projects. With regard to hardwood vs softwood doors, the difference is significant and should be carefully considered as it will affect your door’s durability, aesthetic appeal (as well as its alignment with the rest of your building’s architecture), and maintenance requirements. Hardwood doors, made of oak or teak for example, flaunt a natural robustness, strength and beauty with its rich, intricate grain patterns, resulting in a more expensive, prestigious choice of door material. Hardwood doors are inherently a more resistant option and will last a very long time if taken care of properly. Softwood doors, made with cedar, redwood, etc, are a more budget-friendly option. These doors are lightweight and are very versatile, especially for interior applications, as they offer a naturally simple and elegant aesthetic which aligns beautifully with most decor and architectural styles. Softwood doors are the more practical, environmentally sustainable choice which make up for what it lacks in natural heft and strength. Your choice of wood will ultimately depend on your specific needs and your vision. We recommend you get in touch with a professional before making any final decisions.


Different Construction Methods


Wooden doors are usually either solid or engineered doors, each of which offer their own advantages and are each ideal for different applications. Solid wood doors, famous for their inherent strength and durability, are made from single large pieces/panels of wood. This classic construction method affords solid wood doors not only a gorgeous traditional aesthetic and robustness, but also some inherent insulating properties. Unfortunately these doors can be susceptible to warping, bowing, etc. if exposed to fluctuating humidity and temperature. Engineered wooden doors are doors that are made of multiple layers of wood (and sometimes other materials) that are pressed and glued together in various directions. This construction method enhances the door’s resistance to damage from environmental changes like humidity or temperature fluctuations. These doors offer better insulation compared to solid wood doors and are more cost effective and eco-friendly due to them generally using less wood in their construction. On the other hand these doors can become very difficult to repair or touch up when they get damaged, due to how they are constructed. Similarly to hardwoods compared to softwoods, the choice between these two types of doors depends on the specifics of your project and your personal vision.


A Brief Look at Different Wooden Door Designs


Panel Doors

Panel doors, identified by their use of flat, framed panels, offer a traditional, but versatile aesthetic which is suitable for most applications. From single-panel to multi-panel doors, these wooden doors are a true classic and will allow you to truly customise your door to match your personal vision. Panel doors are popular due to their sheer diversity, ensuring that there is a fitting option for almost any application.


Flush Doors

Flush doors are known for having a simple, modern look with sleek, flat surfaces that are void of any panels or ridges, which makes these doors ideal for minimalist contemporary settings. Flush wooden doors are made by encasing an internal frame between two flat panels made from plywood, MDF or wood veneer. This allows for a wide range of aesthetic finishes. Flush doors come with solid and hollow core options, where solid-core doors offer better thermal and noise insulation, these are also more durable than the hollow-core alternative which are more lightweight and cost effective. Due to flush doors’ balance of function and style, they are an ideal choice for many different applications.


French Doors

The French door is an elegant wooden door option which features large glass panels set within frames. These doors allow for natural light to flow into your rooms, giving them an airy, open feeling. French doors are thus perfect for separating living spaces in homes without making them feel disconnected or small. These wooden doors also make great doors to your outdoor spaces as they can help blur the line between your indoor spaces and the natural outside beauty. French doors can be customised in terms of the amount of window panels, panel size, opening mechanism (swinging or sliding doors), colour and material, all of which make them a versatile choice for many different types of homes.


Stable Doors

Stable Doors are split horisontally, allowing the top and bottom halves of the door to hinge independently. This unique functionality allows these doors to remain closed (bottom half of the door) while allowing fresh air flow and natural light to flood the room it’s attached to. These charming doors are traditionally seen serving as external kitchen doors. Stable Doors offer the perfect balance between security and openness, thus making the stable door fantastic for homes with small children or pets for example.


Choosing the Right Door for Your


Considerations for Exterior Doors

When picking which door you want to use and an exterior door, we suggest prioritising weather resistance, durability and security. Of course it is also important to select a wooden door that boosts your home’s curb appeal and matches the aesthetic style of your home or your overall vision. Hardwood doors or reinforced engineered doors are popular options for external wooden doors because of their innate strength and durability, which comes at no cost to beauty. We highly recommend speaking to a professional to help you make the perfect choice for your exterior door.


Interior Door Selection

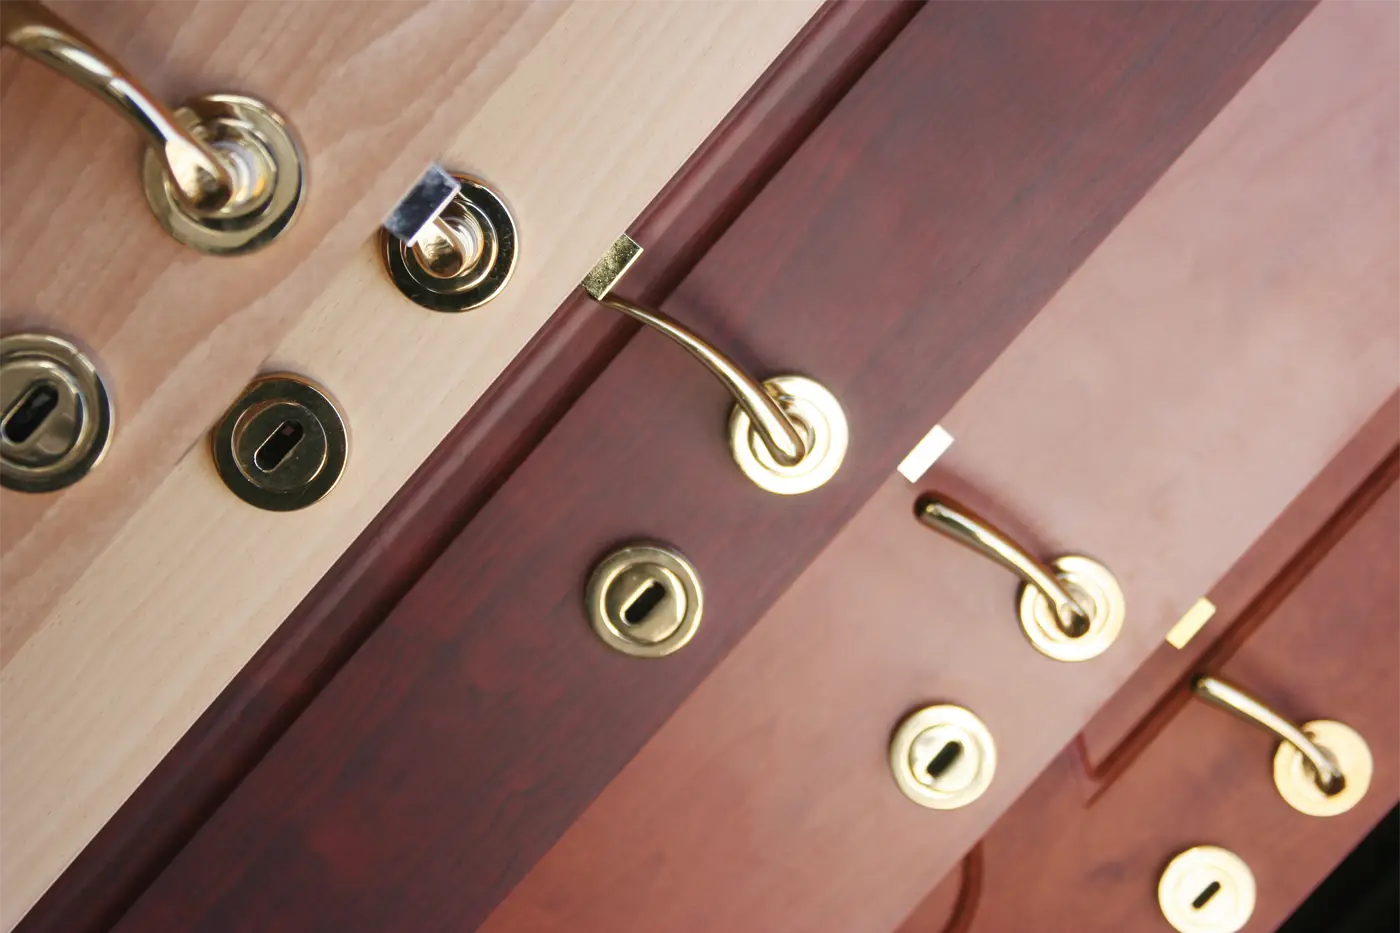
Choosing the best interior door for you would mean balancing aesthetic and functionality. You will have to find a door that not only compliments the rest of your home's style, but one that offers adequate noise insulation and privacy for each room. You very likely would need an array of doors for your home’s interior. You may consider solid doors for bedrooms in order to maximise noise insulation. Bathrooms would require something durable and moisture resistant while closets and pantries would need something less durable and decorative. We again recommend speaking to a professional to ensure that you find the right doors for your home. In conclusion, the specific wooden door you select will have an impact on both the aesthetics and the functionality of your home. In this blog, we discussed the many different types of doors available to you, as well as key aspects to keep in mind when selecting either external or interior wooden doors. We highly recommend consulting with a professional to help ensure that you select the perfect door for your home. If you would like to read more door related guides or blogs, feel free to check out all of our blogs or take a look at the wide range of doors that we offer.

The Advantages Of Aluminium Doors In Modern Architecture


The Advantages Of Aluminium Doors In Modern Architecture


Glass and steel have grown in popularity for years now, thanks to the increase in people who want a more modern twist to their buildings, such as clean lines, open spaces and modern colour palettes to name a few examples. This embrace of modern architecture has gradually done away with the ornate carpentry and heavy masonry of yore and instead,  focused on minimalism, openness and functionality. More recently, however, aluminium has taken the spotlight for its minimalistic, modern style and its sustainable and durable properties. In this blog we’ll delve deeper into the properties of aluminium doors and why they could be advantageous additions to your building.


The Aesthetics Of Aluminium Doors In Modern Architecture


Aluminium doors have transcended mere functionality, becoming key additions in crafting the modern aesthetic that we all know and love. Aluminium’s inherent sleekness embodies minimalism, seamlessly integrating with the strong lines and maximised natural light, both of which are staples in modernistic architecture. Unlike bulky and ornate frames of more traditional doors, aluminium profiles are slender, smooth and clean. When coupled with large, expansive windows, we can create a home layout that dissolves the barrier between indoors and outdoors.


But aluminium's beauty goes beyond minimalism. Its versatility is unmatched. Forget boring metal doors; today, choose from a spectrum of vibrant colours to complement your design, from cool blacks and silvers to bold pops of colour that make a statement. Anodised finishes create a metallic sheen, while powder coating offers a wider palette with matte or textured options. This adaptability allows you to tailor your doors to perfectly match your unique vision and style. Whether it's a sleek industrial vibe or a vibrant, friendly aesthetic you’re after, the possibilities are endless.


The Undeniable Durability & Performance Of Aluminium Doors


Aluminium's lightweight strength, allows the material to thrive across South Africa's diverse climates. Its natural corrosion-resistant oxide layer shields it from rain, salt, and even mild acids, while its reflectivity keeps things cool even under the hot African sun. From windswept, humid coasts to sun-baked plains, aluminium's inherent strength and weather resistance make it a versatile and durable choice for any South African building in need of durable, high-performance doors.


What exactly are the performance capabilities of aluminium doors?


Thermal Insulation:


Aluminium doors incorporate insulating materials like polyamide strips, which can significantly reduce heat transfer. This is known as “thermal break technology” which reduces the amount of heat that transfers between the outer and inner profiles of your aluminium door, thus helping to keep your home temperature regulated. Most modern aluminium doors often go beyond the thermal break technology, giving you the option to incorporate high-performance or double-glazed glass to further enhance the thermal insulation of your door.


When choosing your aluminium doors, you will also have the option to get one with a low U-value or thermal transmittance. The lower this score on any aluminium door, the less heat transference takes place. These features significantly help regulate indoor temperatures and improve energy efficiency in your home. 


Soundproofing:


The same glass options that improve the thermal insulation of your doors can dampen sound from the outside. Aluminium doors, when properly sealed minimise sound leaks around the frame. This will help mitigate the sound coming in and going out through your door. When choosing your aluminium doors, you also have the option to get one with a higher STC rating (Sound Transmission Class). A higher STC rating means better noise insulation. Note that none of these options can assist when your door is exposed to direct rain or hail, the noise of which may even become amplified by your aluminium door frame. It is also important to keep in mind that the noise insulation of your door depends heavily on the implementation and specific features installed.


Fire Resistance:


Aluminium doors transcend aesthetics and durability, going so far as to weave fire safety into your home. These doors have an inherent non-combustibility and high melting point which stands as your first line of defence. Meticulously designed fire-rated options raise the potential safety factor even higher. This isn't just about ticking regulations; it's about peace of mind, knowing your loved ones and your home are as safe as they can be.


Durable & Versatile:


In South Africa's diverse climate, aluminium doors excel thanks to their impressive resistance to corrosion, warping, and even salty coastal winds. Surprisingly lightweight and easier to install than other options, their strength doesn't compromise aesthetics. From sleek modern styles to classic finishes, aluminium doors boast an extensive range that seamlessly blends with any architectural vision. These features make them versatile choices for contemporary buildings across South Africa.


Effortless Upkeep & Long-Term Value:


Aluminium doors also shine in their low-maintenance needs. A simple occasional wipe-down keeps them looking pristine, saving you time and money on upkeep. This, coupled with their exceptional durability and long lifespan, minimizes the need for replacements, further enhancing their cost-effectiveness. While aluminium doors might have a higher initial cost compared to timber options, their long-term value proposition through minimal maintenance and extended lifespan makes them a compelling choice for many homeowners. Ultimately, the best selection depends on your project's budget and desired door features.


The Sustainability & Environmental Benefits Of Aluminium Doors In ZA


When it comes to sustainable building materials, aluminium doors deserve a standing ovation. They boast 100% recyclability, making it an eco-friendly building owner’s ideal choice. Did you know that around 70% to 75% of all aluminium ever produced is still in use today? This is possible seeing that aluminium can be recycled almost endlessly without compromising the unique properties and quality of the material. Even South Africa's diverse climate can't diminish its sustainability.


Aluminium's natural corrosion resistance reduces the need for harmful finishes to extend its lifespan, which minimises waste and the environmental footprint of your building. The next time you consider doors for your South African home, choose aluminium. It's not just the smart choice for durability, safety and style, but also a brilliant player in terms of a sustainable future.


Security & Functionality Of Aluminium Doors In South Africa


In South Africa, where security is paramount, aluminium doors stand tall. Their inherent strength starts with the material itself. Aluminium's high strength-to-weight ratio offers superior resistance to forced entry when installed correctly. This resilience is further bolstered by multi-point locking options, engaging the door at multiple points for enhanced security. Additionally, reinforced profiles and security glazing options further deter potential intruders.


But security isn't just about strength; it's also about convenience. Aluminium doors are renowned for their smooth operation. This is especially important for frequently used doors like building entrances. Modern aluminium doors also seamlessly integrate with automation systems, allowing for keyless entry, remote control access, and even integration with smart home technology, offering convenience and peace of mind.


It goes without saying that aluminium's versatility shines through in its application range. Whether you need a secure front entrance, a spacious sliding door for seamless indoor-outdoor living, or even interior partitions for flexible room layouts, aluminium doors deliver. Their inherent durability and sleek aesthetics make them suitable for various styles and applications, offering a perfect blend of security and functionality. All of these features make aluminium doors an obvious choice for South African building owners in need of functionality and security.


In conclusion, aluminium doors transcend aesthetics, weaving performance and sustainability into your South African building. Their sleek lines, exceptional durability, and thermal insulation create a haven of comfort, style and safety. Choose from a spectrum of vibrant colours and finishes to match your vision, all while enjoying the peace of mind of near-infinite recyclability and fire resistance. Security is ensured with multi-point locking systems and innovative options like automation.


While we've explored the many advantages of aluminium doors, the ideal choice for your specific needs and unique style will always be personal. Our team of door experts is here to guide you every step of the way, from initial consultation to professional installation - so feel free to contact us today. Want to delve deeper into specific door solutions or gain more home improvement insights? Explore our collection of informative blog posts! We cover everything from the latest door trends to expert tips on maximizing your home's functionality and style.

How to Fix And Prevent Swollen Exterior Doors


A Step-By-Step Guide To Door Swelling Prevention And Repair


Are you a sufferer of swollen exterior doors that stick, squeak, or just plainly refuse to close properly? Well you’re not the only one. Swollen exterior doors are a common problem that many homeowners face today. In this essential guide, we’re going to dive into why doors tend to swell and, most importantly, how you can avoid your doors from ever swelling in the first place and how to fix your doors when they do swell.


Why Do Exterior Doors Tend To Swell?


Wood is a hygroscopic material, which means that it absorbs, and releases,  moisture from the surrounding air. When the humidity in your door’s environment is high, it will absorb moisture and swell. When the humidity is low, your door will release moisture and shrink. Humidity coupled with exposure to rain and direct sunlight may cause wooden doors to expand and shrink unevenly, which will cause issues. These situations can also cause your door to warp which we cover in our blog, How To Fix & Prevent Warped Wooden Doors.


How To Fix Your Swollen Door


  • Check Your Hinges & Threshold

Before we start taking your door off and going to work, we should examine your door hinges and door threshold. Ensure that your door isn’t getting stuck due to loose or broken hinges. If your door hinges are loose, tighten them and if they are damaged beyond repair, replace them. Your door’s threshold needs to be properly installed and level with the floor, if this is not the case we suggest reinstalling the threshold if it is in good condition, otherwise you may need to replace it.


  • Inspect The Damage

If both your hinges and threshold are in working order and your door is still getting stuck or won’t close properly, the first thing you should do is examine the door for any signs of damage. If the door is damaged, you may see signs of warping, cracking and splitting, swelling, or water damage. For a repair guide for warped doors, take a look at our blog, How To Fix & Prevent Warped Wooden Doors.


If you find that your door is in fact swollen, you need to evaluate how severe the swelling is and where the swelling has taken place. When a door is slightly swollen in, for example, the bottom of the door, a simple sanding might suffice (only up until step 3 of this guide). However, when the swelling is across the entirety of your door, you may need to do some more extensive repairs (follow this entire guide). In extreme cases where your door is severely swollen to the point of compromised structural  integrity, you may have to replace the door.


  • Remove And Initial Sand

The next step, after you have found that your door is in fact swollen, is to take it off the hinges for sanding. Don’t forget your safety glasses and facemask, work in a well ventilated and well lit area. Sand the door with a coarse grit in order to remove any finish or paint that might trap moisture within the door. After the paint or finish is removed from the door you may move on to the next step.


If, however, you’ve evaluated the swelling to be minor and localised, you may sand the swollen area. Ensure that you feather the edges so that it blends into the rest of the door surface. Once the swollen area of the door is levelled, you may move to a finer and finer grain paper to sand the entire door until you’re left with a smooth surface. Even with these minor swelling cases, we recommend you still dry the door before applying a finish or paint (skip step 5 in other words).


  • Dry Out The Door

In order to dry out your door properly, you need to leave it in a controlled environment (garage or a workshop of some kind) with a dehumidifier. When drying out your door you need to be patient, because in order to avoid additional stress or warping on your door, it needs to dry out gradually. Depending on the wood your door is made of, the amount of water within the door and how well you sanded it, drying can take from a day or two to a few weeks. For an exact estimate we recommend contacting a professional.


To ensure your swollen door dries properly without over-drying, regular monitoring is essential. Begin by checking the door’s fit in its frame. If it starts to close smoothly without sticking, this is a good indicator that the swelling is reducing. Additionally, use a moisture metre for a more accurate reading of the wood's moisture levels (A stable reading over several days typically signifies that the door has sufficiently dried). Visual inspection is also a viable technique; look for any remaining signs of dampness or discolouration. For a more tactile approach, the door should also feel dry and return to a lighter weight when dried adequately. It's important when in doubt, or when working on a particularly valuable door, to seek advice from a woodworking professional who can provide guidance tailored to your specific situation and ensure the best care for your door.


  • Final Sanding

After the door has dried sufficiently, especially if the swelling was not minor or localised, you must do a final sand of your door. Start sanding the door with a coarse sandpaper, gradually moving to finer and finer grits while periodically checking the fit of the door - put it back on the hinges every now and then to see how well it fits. It is crucial in this step to sand away any remaining swelling or unevenness on the door’s surface that may have remained after the door has been dried properly. Stop when the surface of the door is even and smooth. If, however, you find yourself sanding away an excessive amount of wood to get to the desired fit or surface finish, then your door may be beyond repair and may need replacing.


  • Apply Stain And Sealant

After drying and sanding, you need to apply a finish to your door. Remember to ensure that you are completely satisfied with how your door fits as well as how it opens and closes before you start applying your finish. Apply your stain or sealant in even thin coats, allowing each coat to dry properly before adding the next one. How many layers you should apply depends on the finish you’re using. Check the instructions on the product you’re using or contact a professional to find out how many coats you should apply to your door for adequate protection. Remember to reapply your chosen finish as time goes on to further the longevity of your door.


  • Reinstall

Finally, after all the above steps have been completed properly, rehang your door in its frame and check whether it opens and closes properly. Keep in mind that this should not be the first time you test how your door fits - you should be sure to test it before applying your finish (before step 6).


How Can You Avoid Swelling In Your Doors?


To prevent swelling in your exterior doors, it's important to focus on moisture management. Start by finding any sources of water exposure, such as rain or high indoor humidity, and address these issues directly. Using a waterproof sealer (applied regularly as time goes on) or getting a storm door/screen are two viable options for addressing these water sources. Remember to keep an eye on your door in order to identify any signs of wear. You should address any surface damage to your door as soon as possible to avoid moisture from seeping into any imperfections in your door’s finish or seal.


If you notice fluctuations in your door’s size with changing seasons, it's usually a clear sign of indoor humidity issues. Placing a dehumidifier in the largest room of your house, or in a central location that affects multiple areas, may help stabilise the humidity levels. A high-capacity dehumidifier not only protects your wooden doors from swelling but also creates a healthier living environment by reducing the risk of mould, bacteria, and viruses that thrive in humid environments. Regularly maintaining your doors with these preventative measures will help you protect your doors from damage such as warping and swelling.


In sum, managing swollen exterior doors boils down to regular maintenance and proactive measures. Frequently sealing your doors with a waterproof sealer and monitoring indoor humidity with a dehumidifier are effective measures you can take to prevent swelling. Additionally, addressing any signs of wear or damage ASAP will help ensure that your doors stay in pristine condition for as long as possible. By following steps in this guide, you can maintain the functionality and appearance of your doors. Please feel free to check out our other blogs on wooden doors for more tips and guides.

Pre-hung vs Slab Doors: What's The Difference and Which is Better?


Are you in the market for a new door and need to make a decision? Or just curious about the difference between pre-hung and slab doors? Either way this blog will help you out!


Each type of door has its own advantages and disadvantages, at the end of the day it generally comes down to your preferences and what you need. Let us explain the difference between pre-hung and slab doors as well as each type’s pros and cons. Read on for a clearer picture that may help you make a well-informed decision.


What’s The Difference?


Pre-hung Doors


Pre-hung doors are usually sold as the “complete package” by manufacturers. These doors come already installed to a door frame. Pre-hung doors are easier to install and are shipped “ready to go” to make the installation job easier and quicker compared to other door types. These doors are generally much heavier to handle - especially when you get a pre-hung exterior door which usually has a heavier/higher-density door core.


Slab Doors


Slab doors are doors that are supplied without the frame or hinges. They are simply just the door, which means you will have to purchase the frame, hinges, and everything else you may need separately. The installation of these doors may take additional effort and time, but the possibilities open up in terms of design, placement, and customisability.


Pros & Cons


Like most things in life, there is no one-size-fits-all answer to the question of which door is better, pre-hung or slab. Both types of doors have their own advantages and disadvantages, and the best choice for you will depend on your specific needs and preferences. Let’s take a look at each door’s pros and cons:


Pre-hung Door Pros


Easy installation: Seeing that pre-hung doors come pre-installed with hinges and a door frame, it results in a hassle free installation process of the door.


Shipped with all necessary hardware: Pre-hung doors come with hinges and a three-sided frame already installed, you just need to pick out your handle, plate and lock (you’ll also need the glass for a door that requires it).


Wide Variety: Pre-hung doors, although limited in some aspects regarding style and customisation, do come in quite a wide variety of different styles and materials to suit your needs.


Energy efficient and well sealed: Most pre-hung doors are designed to be energy efficient with features such as weatherstripping and insulation. They are also designed to seal very well - blocking air and water from leaking into your home.


Pre-hung Door Cons


Expensive:  Due to pre-hung doors being made with high-quality materials and coming with pre-installed hardware, they tend to be more expensive than other door options - especially if you look at doors with additional features such as custom materials etc.


Heavier than other doors: Seeing that pre-hung doors come pre-assembled with a door frame they can be much heavier than regular doors, thus making them more difficult to handle when you’re DIY-ing alone - that being said, we do recommend hiring a professional to help you install your doors.


Lacking in terms of design freedom: Pre-hung doors are generally less flexible in terms of customisation and design than slab doors are.


Slab Door Pros


Less Expensive: Due to the fact that slab doors do not come packaged with any additional hardware, they tend to be cheaper than pre-hung doors.


Lighter and easier to handle: Slab doors are purchased as just a door alone, which means that the whole item (the door) is much lighter and easier to handle than pre-hung doors. Certain types of wood weigh more than others, which means that the door you select may still be too heavy to handle by yourself.


More flexible regarding design and customisation: Due to slab doors not being constricted by the stain, paint, frame etc. - which is already installed with pre-hung doors - you can do a lot more design and custom work by yourself to ensure that the door matches your home and your vision.


Slab Door Cons


More difficult installation process: The installation of slab doors tends to be more complicated than that of pre-hung doors seeing that you are going to have to do the bulk of the work - from adding a finish to the door to installing the door frame and hardware.


Requires additional hardware: Slab doors do not come packaged with any additional hardware. You will thus need to purchase the hardware you need separately, such as: a door frame, door handles and strike plates, door locks, etc.


May need professional help and modifications: For those uncomfortable with a DIY project of this scale, you will require professional assistance, which will add to the overall cost of the project. Professional help may also be required when the door slab is too large for your doorway or door frame, as it will have to be cut to size and treated afterwards.


Comparison


Feature

Pre-hung Doors

Slab Doors

Ease Of Installation

Easy

Complicated and more difficult

Hardware

Packaged with all necessary hardware (excluding handles and locks)

All hardware needs to be purchased separately

Variety

Moderate variety of styles and materials (lacking in design and customisation variety)

Wide variety of styles, materials, design possibilities and customisation options

Energy Efficient Features

Generally energy efficient and sealed

May not be energy efficient or well sealed, depending on your installation

Cost

More expensive

Less expensive

Weight

Heavier and more difficult to handle

Lighter and easier to handle


Ultimately, the better door is the one that suits your goals, budget and your taste. As established above, both pre-hung and slab doors have their own set of pros and cons which means that both solve unique problems. For example, if you’re looking for a fast and easy job, then the pre-hung would likely be better for you. Similarly, if you want a fully customised door and don't mind the extra effort, a slab door would likely be your best choice.


Regardless of the type of door you select, ensure that you do your research and speak to a professional if necessary. This will ensure that you get the right door for your needs. We also  recommend that you consider hiring a professional to help you install your door, regardless of the type of door you choose. For more information on door-related topics, please check out our other blogs.

How To Fix & Prevent Warped Wooden Doors


Warped wooden doors are a somewhat common issue in many homes. Warped doors can be a frustrating nuisance, but luckily there are ways to fix a warped door, and there are ways to prevent wooden doors from warping in the first place.This blog will serve as your guide for fixing your warped door, and ultimately preventing any warping in the future.


What Causes A Door To Warp?


Changes In Humidity: Wood is a hygroscopic material, which basically means that it absorbs moisture out of the air. When the humidity in a wooden door’s environment is particularly high, it will absorb more moisture and swell. When the humidity is low, the door will lose moisture and shrink. This can cause wooden doors to warp - especially when the humidity in the environment changes from high to low (and vice versa) suddenly.


Extreme Heat: Heat causes materials, like wood, to expand. This can cause wooden doors to warp when, for example, one side is exposed to heat while the other side remains cool in comparison, the door will warp towards the hotter side.


Improper Finishing: What does a good finish do for a wooden door? It adds durability to the door, it makes it look beautiful for longer, but most importantly, it protects from the elements. A wooden door without a proper finish will thus be more exposed to moisture and heat, and will be more prone to warping,


Bad Construction With Poor Materials: Poor construction will leave a door with many weak points that will be exploited by humidity and heat. Using poor wood that isn’t properly seasoned (dried for a sufficient amount of time) will also result in a door that is more prone to warping - properly seasoned wood is also less likely to be attacked by pests and fungi.


How To Fix Your Warped Doors


Step 1 - Identify The Warp

Take a look at your door and examine the extent of the warp. It will either be bowing, cupping, or twisting. After you’re done examining your door, remove it from its hinges with a screwdriver and take the door to your working station.


Step 2 - Apply Moisture

Dampen the side of the door that is convex (curving outward). Use a damp or wet cloth. The moisture should help relax the wood fibres within your door. Leave your door in a cool, dry area for a few days so that it can acclimate to the new moisture level.


Step 3 - Apply Pressure

Start by laying your door down on a flat, clean, even surface with the concave side (the side curving inward) facing upward. Apply wood glue to the concave side of the door (you only need to apply the glue to the areas affected by the warp). Clamp the door to the surface it is on - these clamps need to be along the warp to apply even pressure. Tighten your clamps until the door straightens out. Allow the door to remain clamped for at least 24 hours so that the glue can set and the door can regain its shape.


Step 4 - Sand & Finish (Optional)

When you have given the door enough time to regain its original shape, you can remove the clamps and begin sanding it down to remove any residue left by the glue. Start with a heavy grit and gradually work your way to the finer grit sandpapers to remove any imperfections on the surface of the door. After you have completed sanding down your wooden door, you can paint it or apply a wood finish (which will help protect the door from warping again in the future).


Step 5 - Hang Your Door

After you have completed the steps listed above, you can hang your door on its hinges, ensuring that it swings smoothly.


How To Prevent Warp In Wooden Doors


Here are a few tips to avoid your wooden doors from warping in the first place, or to avoid them warping again.


Use A High-Quality Wood: When purchasing a wooden door or building one yourself, we recommend investing in quality, well-seasoned wood seeing that it will minimise the risk of warping. Some great types of wood that are more resistant to warping than other woods is; Mahogany, Oak, Maple, Cherry, and Walnut.


Proper Installation: Ensure that your wooden door is installed correctly, meaning it needs even and sufficient support and appropriate clearance. If your door has proper support and isn't being damaged every time it opens or closes by hitting a wall. Roof, step etc. it will go much longer without getting a warp since it should keep it’s strength and durability.


Seal & Finish: Apply a protective sealant or wood finish to protect your door from moisture infiltration and heat to some extent.


Control Humidity: Using a humidifier in dry conditions and a dehumidifier in humid conditions will help you keep a consistent climate with regard to humidity. Inconsistent humidity levels are one of the core causes for warps in wooden doors. This tip is more applicable to internal doors since it will be very difficult to control what your external doors are subject to from the outside environment.


Regular Maintenance: It is recommended that you inspect your doors frequently so that you can address any issues promptly. Doing so will ensure that your doors get the attention they need before warping.


Conclusion


In sum, warped wooden doors are a common issue that can be caused by a variety of factors, such as changes in humidity, extreme heat, improper finishing, and poor construction. While warped wooden doors can be frustrating, they can be fixed and prevented with the right care and attention. If you have a warped wooden door, the first step is to identify the warp, and follow the steps in this blog to fix it. The steps involve applying moisture, applying pressure, sanding and finishing (optional), and hanging the door. To prevent wooden doors from warping in the first place, it is important to use high-quality wood, ensure proper installation, seal and finish the door, control humidity, and perform regular maintenance. By following these simple tips, you can keep your wooden doors looking and functioning great for as long as possible.